Adding/Removing an Administrator
The main administrator for an organization can easily add or remove others as administrators.
To add an administrator:
- Ensure the person(s) you plan to add as administrators have created a KidCheck login account.
- A “login” account means they need to have completed a full account with a username and password, not just set up a basic account created at a check-in station with the “Create New Account” link.
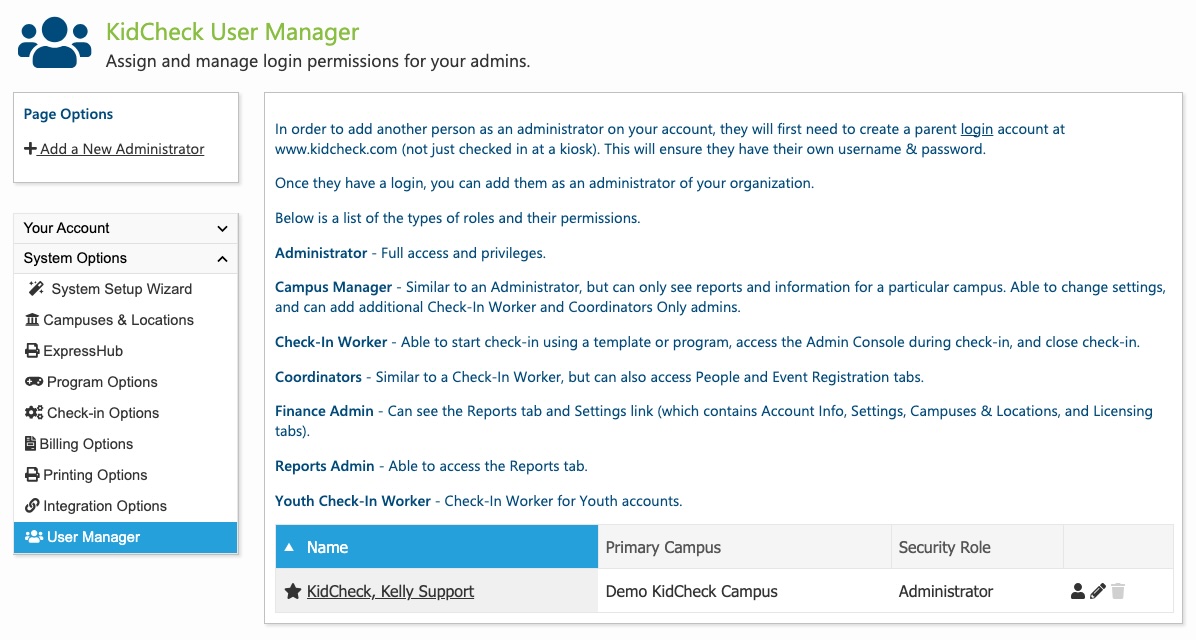
- Log into KidCheck and go to System Settings on the top right
- On the left select System Options
- Select User Manager (under System Settings)
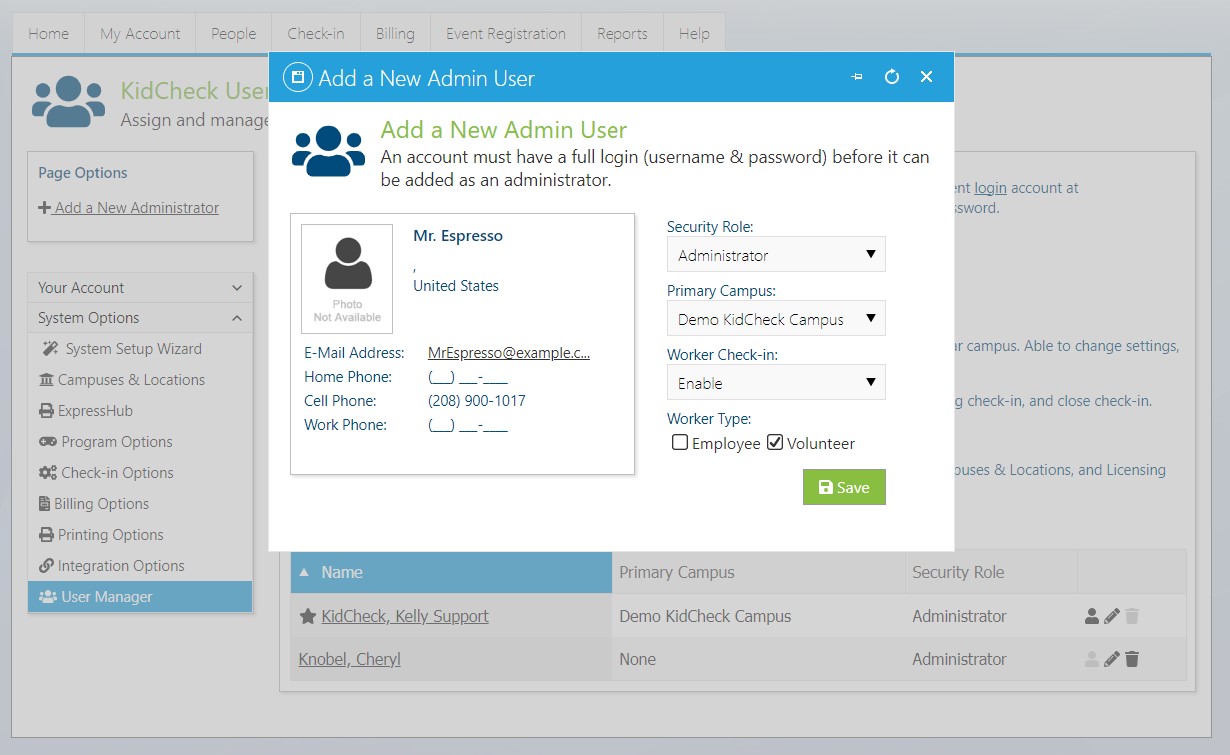
- Select +Add a New Administrator (on the left under Page Options)
- Input their phone number
- When you find the proper person, click on their name
- Next, choose the appropriate user role (see role descriptions below)
- If the person is also planning to be a volunteer you can enable this designation at the same time
- Click Save
The individual will now have administrative access rights when they log into their KidCheck account using their personal username and password.
For a video walk through on how to add an administrator to an organization account, click on this link – How-To Add A New Admin
To remove (or change) a user’s administrative access:
- Log into KidCheck and go to System Settings on the top right
- On the left select System Options
- Select User Manager (under System Settings)
- Select the trash can icon to delete an admin, or select the pencil icon to edit an admin’s user role
Admin User Role Descriptions
- Administrator – Full access and privileges.
- Campus Manager (for customers that have Campus Accounts) – Similar to an Administrator, but can only see reports and information for a particular campus. Able to change settings, and can add additional Check-In Worker and Coordinators Only admins.
- Check-In Worker – Able to start check-in using a template or program, access the Admin Console during check-in, and close check-in.
- Coordinators – Similar to an Check-In Worker, but can also access People and Event Registration tabs.
- Finance Admin – Can see the Billing tab, Reports tab, and Settings link (which contains Account Info, Settings, Campuses & Locations, and Licensing tabs).
- Reports Admin – Able to access the Reports tab.
- Youth Check-In Worker – Check-In Worker for Youth Accounts (this security role can only launch YouthCheck Check-In templates, and can only view youth checked into YouthCheck from the Admin Console).

