Billing: Check-In Passes
Check-In Passes enable guardians to pre-purchase childcare ahead of time, on a renewing basis, or at time of use. Also see Add-Ons and Discounts for additional childcare billing options.
(Note: Check-In Passes are only available on the Premier edition and older editions of Premium, Campus, Business, and Business Unlimited.)
As an admin, initially create your pass. Parents then pre-purchase passes on their own computer or directly via
check-in.
-
Setting Up Your Merchant Account
-
Creating a Pass for Purchase
-
Purchasing a Pass from Home
-
Purchasing a Pass from Check-in
-
Using a Pass from Check-in
-
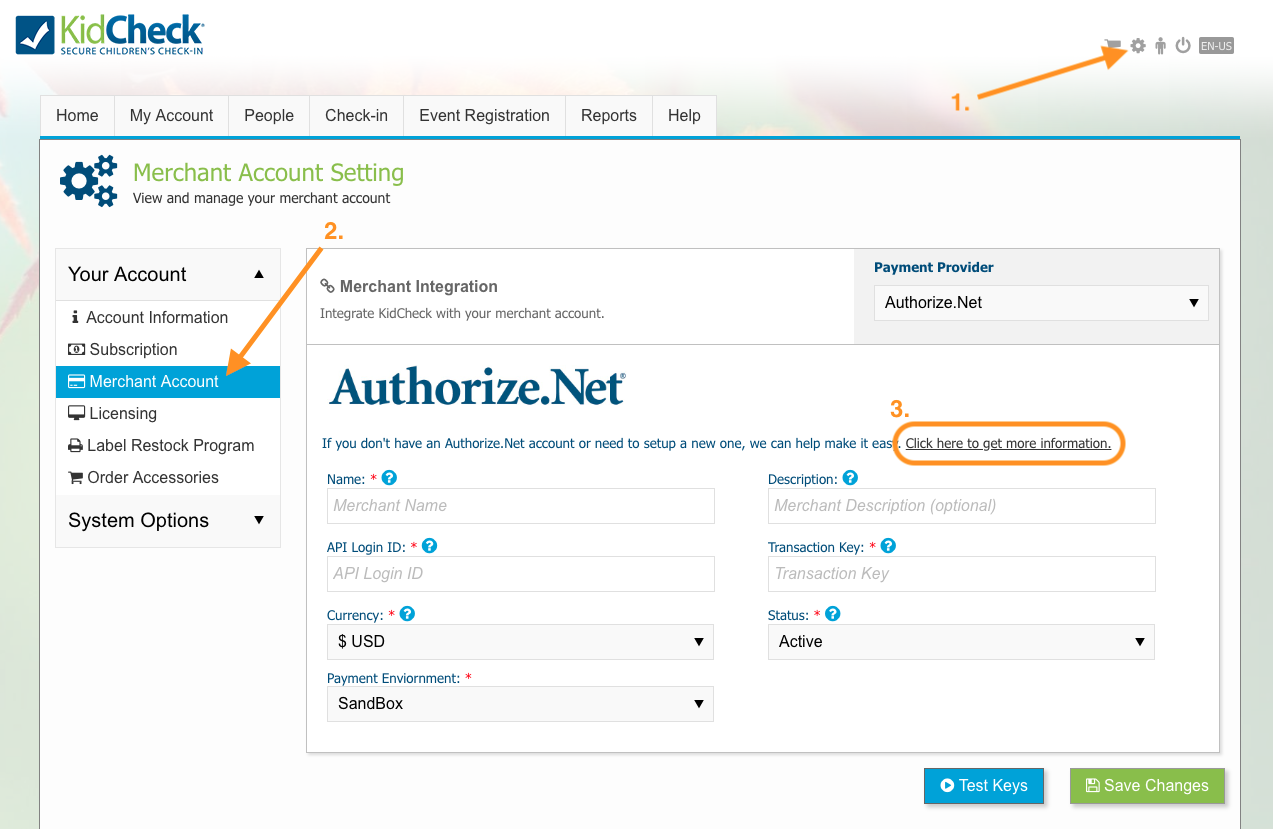
Setting Up Your Merchant Account
- To start setting up your Authorize.Net account, navigate to System Settings > Merchant Account (on the left).
- Select the ‘Click here to get more information’ link in the section description and fill out the form. KidCheck will then contact you to continue the process/paperwork of setting up your merchant account.
- Once your merchant account is created (the paperwork process takes about a week), navigate to System Settings > Merchant Account (on the left).
- Enter the requested information from your merchant account and save the changes.
Fill out the Request Authorize.Net Account form. KidCheck will walk you through the process of creating an Authorize.Net account.
-
Creating a Pass for Purchase
- Navigate to Billing > Check-in Passes.
- Select the green +Create New Pass button on the left.
- Follow the pass creation wizard to select desired pass type, locations, parameters, cost, etc.
- Once pass is created, share the link (on the left of the Check-in Passes tab) with guardians to purchase passes at home or guide them to purchase passes directly from check-in.
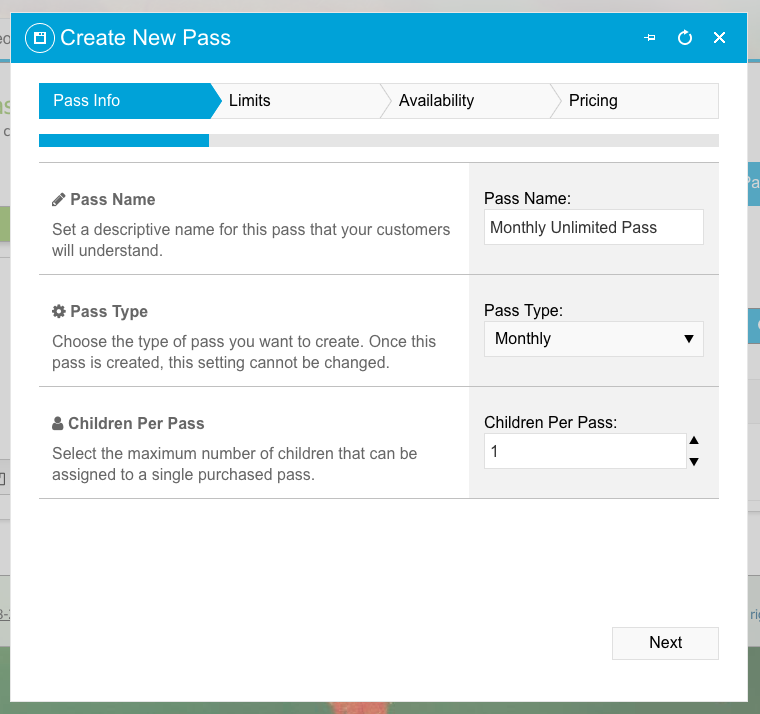
Follow the options of the Create New Pass modal to set up a new pass.
-
Purchasing a Pass from Home
- Select the shared link to view an organization’s passes. (Or log in to KidCheck account and navigate to My Account > Purchases > + Buy a New Pre-Paid Pass > search for desired organization.)
- Choose a pass to purchase and select the Add to Cart button.
- When ready to complete your purchase, select the My Cart button.
- Enter your card to purchase the pass or select a saved card already on file, and select the Complete Purchase button.
- Once the purchase completes, assign the pass to a child using the Assign button.
- The pass is now pre-purchased and ready to use the next time you check-in at the organization you purchased the pass for.
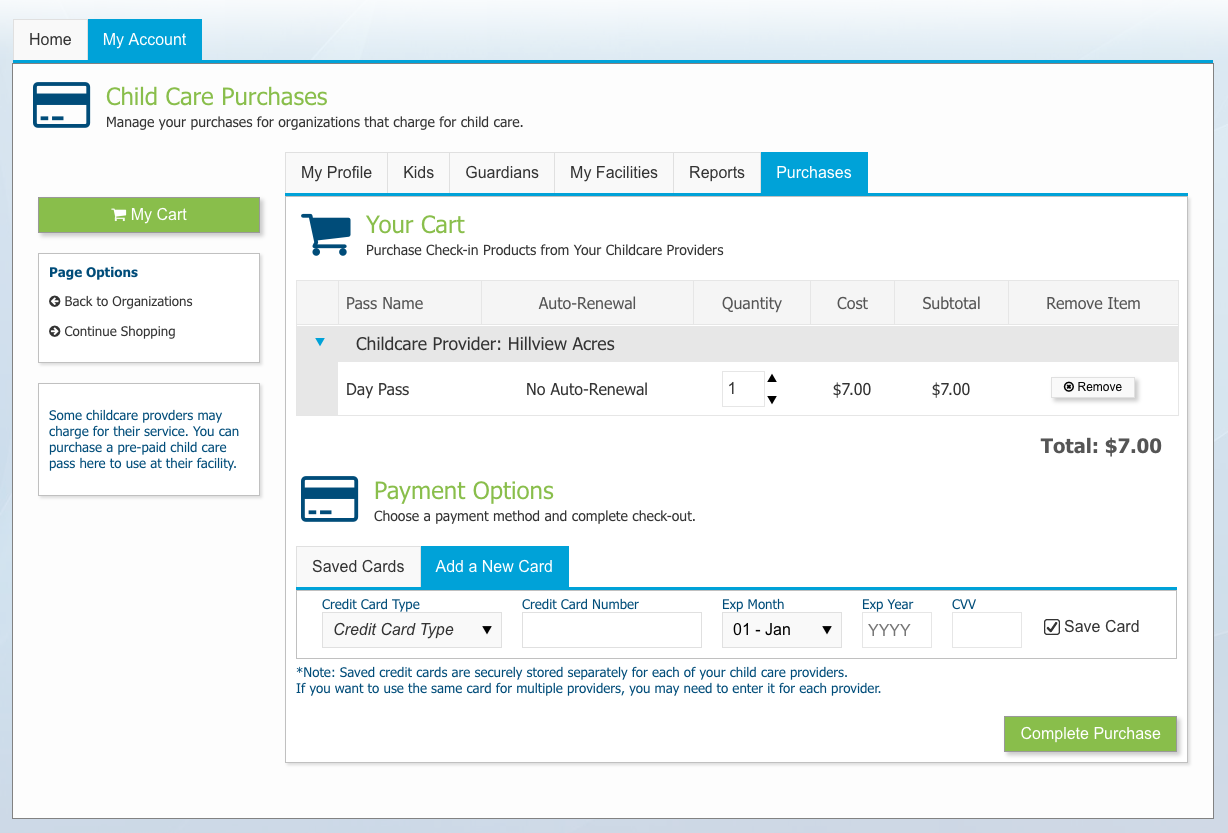
Parents can buy a pass online from the comfort of home. They can then use the pass during their next check-in.
-
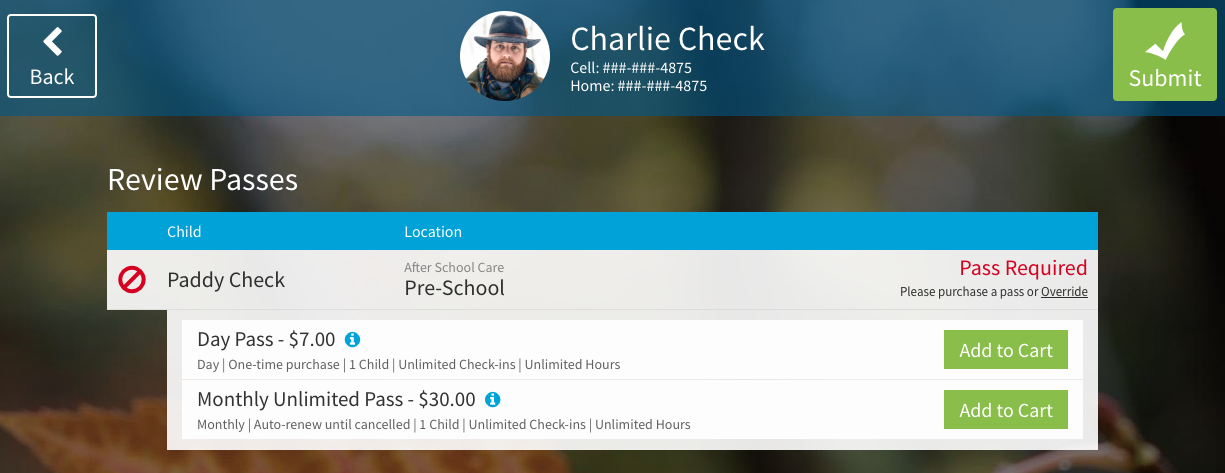
Purchasing a Pass from Check-in
- Input phone number and select child to check-in.
- If the chosen location requires a pass, you will be taken to a screen to purchase a new pass.
- Choose Select a Pass>Add to Cart for the desired pass.
- Select the Purchase & Complete Check-In button and swipe a credit/debit card (or use the enter form on the Complete Purchase modal) to purchase the pass.
- Submit the check-in using the Submit button.
Parents can buy passes while checking a child in.
-
Using a Pass from Check-in
- Input phone number and select child to check-in.
- If the chosen location requires a pass and you pre-purchased the pass, you will see a Review Passes screen.
- Confirm the use of the pass and submit the check-in using the Submit button. (Note: If a pass is automatically renewing, the card on file may be charged upon check-in).
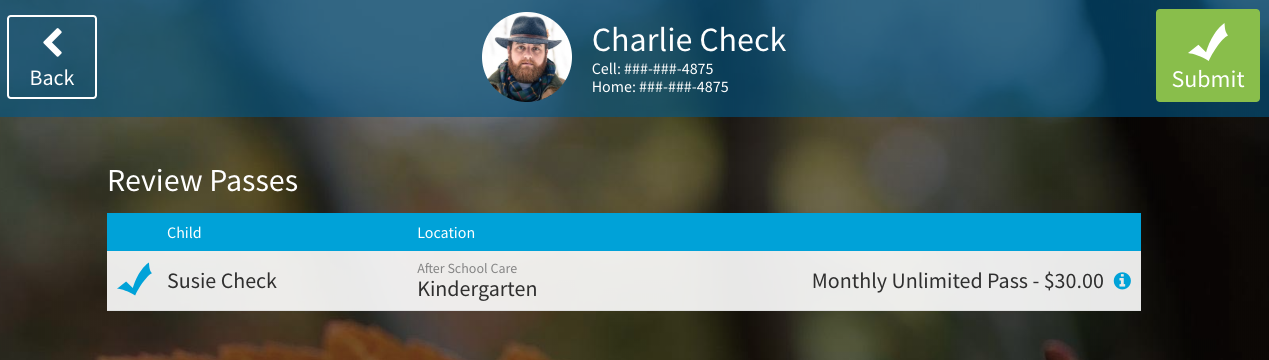
Parents review pre-purchased passes while checking in.