Partnered Background Check
Through a partnership with Protect My Ministry, KidCheck administrators can order and track background checks for their volunteers and employees right from KidCheck. Available on Plus and Premier Editions.
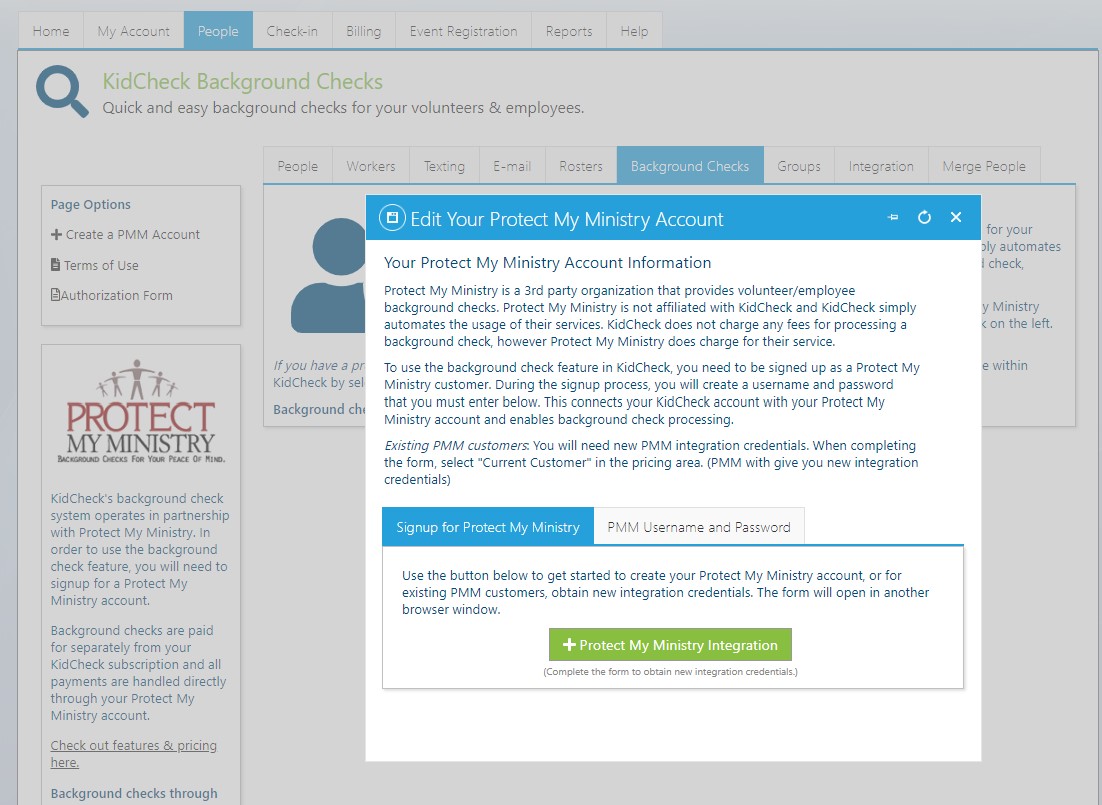
In order to use the background check feature, you will need to signup for a Protect My Ministry account. Background checks are paid for separately from your KidCheck subscription, and all payments are handled directly through your Protect My Ministry account.
Note: KidCheck’s integrated background check option is currently available for US customers only.
Set up your Protect My Ministry account
- Sign in to your KidCheck admin account.
- Click on the People tab, and then on the Background Checks tab.
- Click the +Create A PMM Account link (on the left). This step applies to both new and existing PMM customers.
- Existing PMM Customers: If you already have a Protect My Ministry account, you will need new PMM integration credentials. Still click the green +Protect My Ministry Integration button, and when completing the form select “Current Customer” in the pricing area at the bottom. PMM will give you new integration credentials. You will use the PMM Username and Password tab to enter the PMM integration credentials into (you will have an option to test and save your credentials there).
- Click the green +Protect My Ministry Integration button and fill out the form to complete the signup process (for new PMM customers). Filling out the form will process a request to send integration credentials to sign into KidCheck with. You will use the PMM Username and Password tab to enter the PMM integration credentials into (you will have an option to test and save your credentials there).
Creating a new background check request
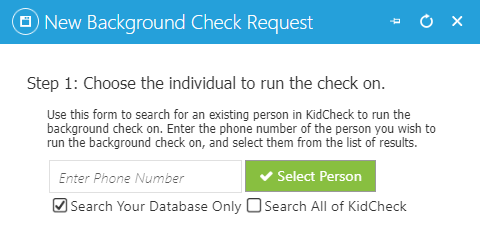
- Click on the People tab, and then on the Background Checks tab.
- Click on the +New Background Check link (on the left).
- If the individual already has a KidCheck account, use the search box to locate their account by entering the phone number.
- If the individual does not already have a KidCheck account, they will first need to create one before the background check can be submitted.
Running a background check.
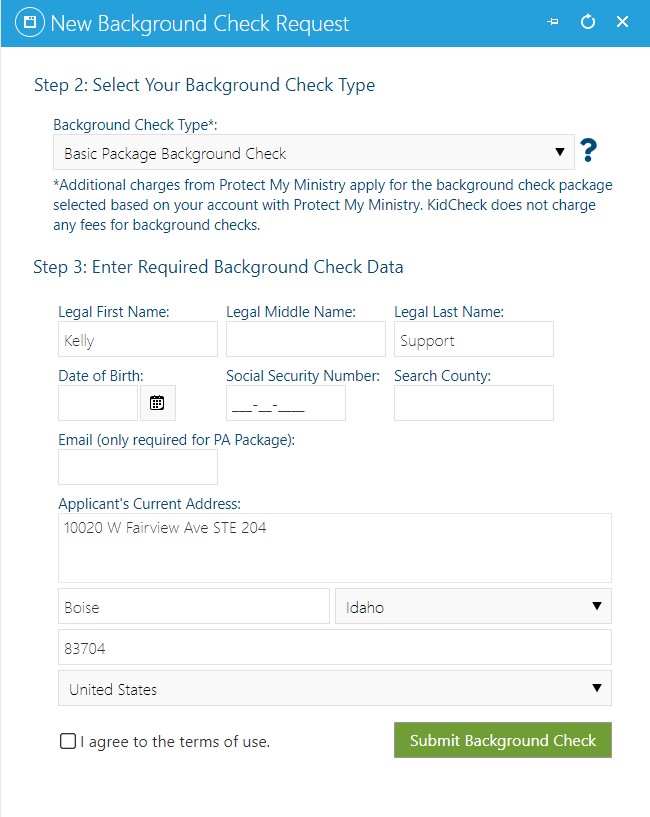
Select the background package type and enter the required info
- Select the package type you’d like to use (this will vary state to state – use the map link to learn more).
- Enter the Additional Required Information about the individual being checked.
- Select “I agree to the terms of use”, and click Submit Background Check.
For more information, here’s a best practices article on Background Check Policies and Procedures.